There’s a lot of different ways that you can increase and add to immersion in your table. In past episodes, we have made reference to a table that John built with a TV in the middle. In this episode, Danielle takes on the MC role and interviews John about questions she’s always wanted answered when it comes to building and running games with a digital table. See below for pictures of the table!
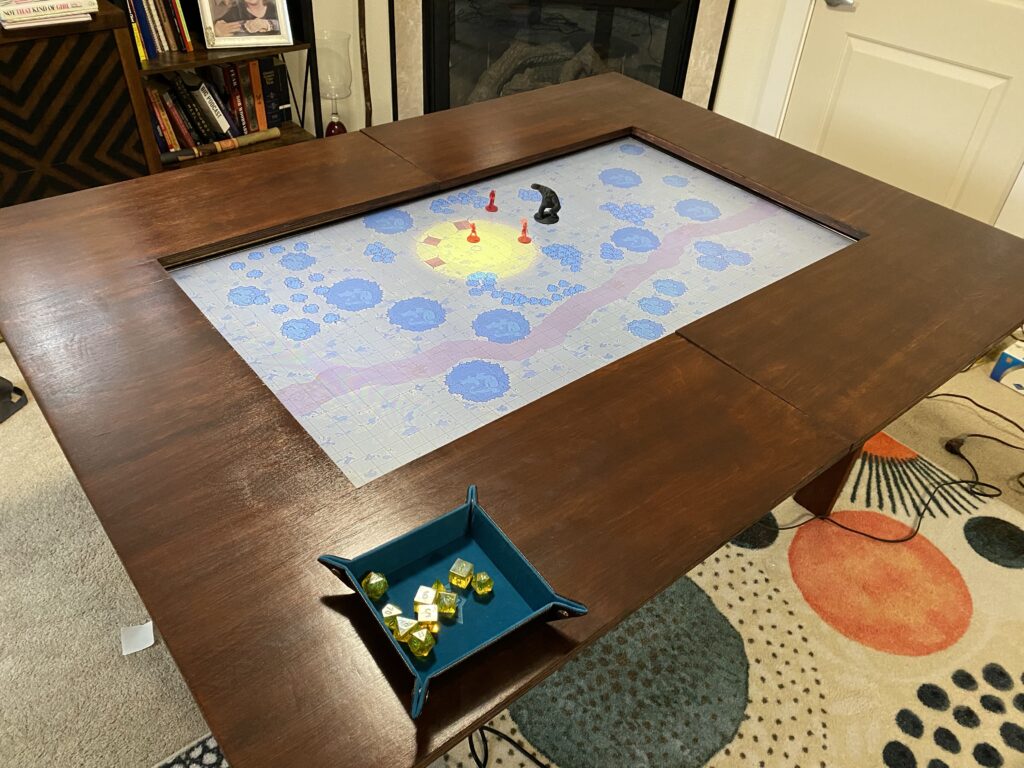
The newest version of the table was built by putting a larger table surface on top of the first version of the table.
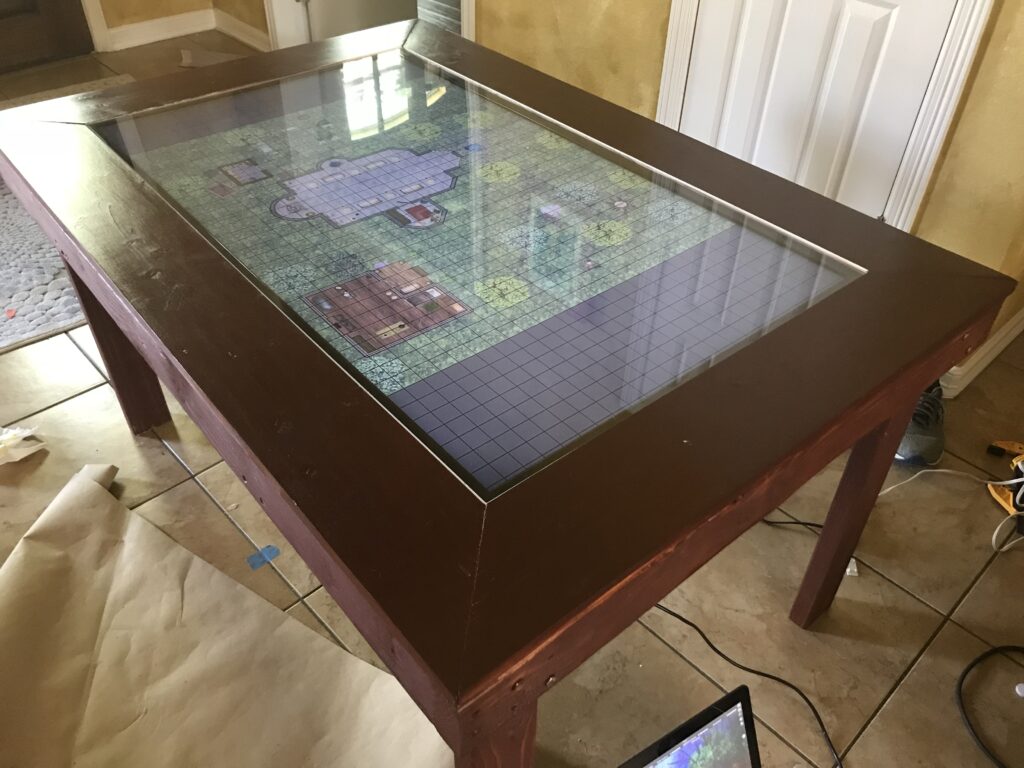
The original version had a lot less table space and used a plexiglass top to protect the screen. The new version uses a then protective film that reduces distortions when looking at the screen from different angles. It also reduces the glare.
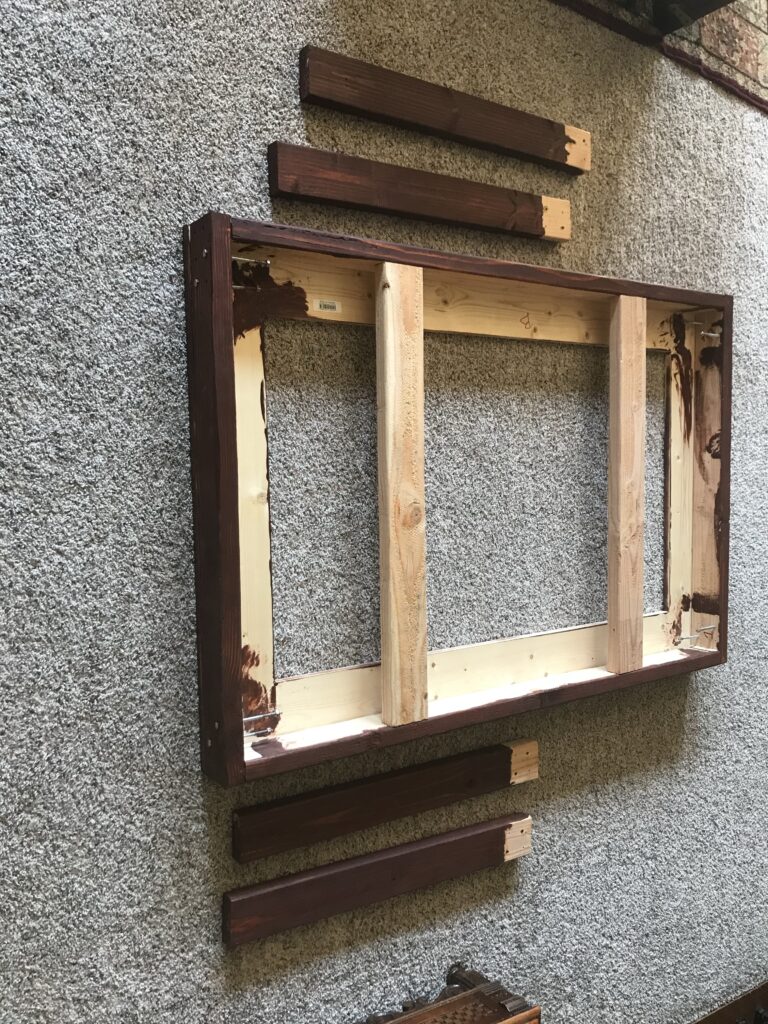
This is a view of the underside of the table with the legs removed for storage. You can see the two 2×4 crossbeams that support the TV when it is assembled.
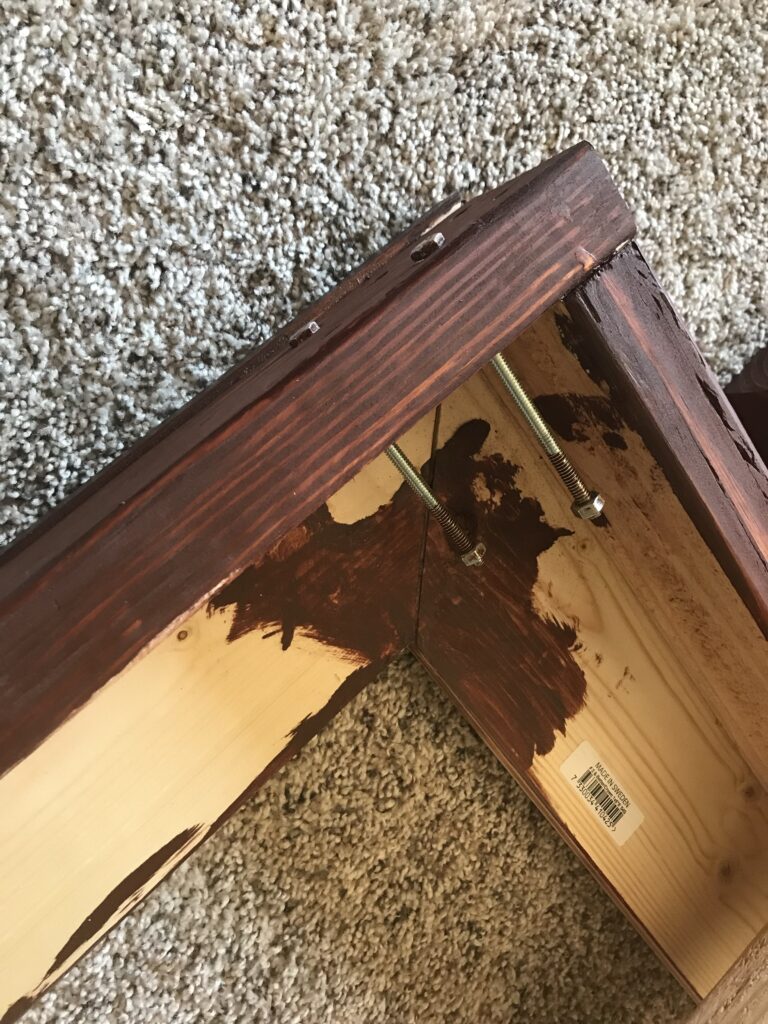
These bolts are used to connect the legs to the table. Rather than worrying about precision of holes, I just labeled each leg to it was clear which position it went in on the table.
